Category Archives: Design Diary

Using ImageMagick to create a POD ready sheet

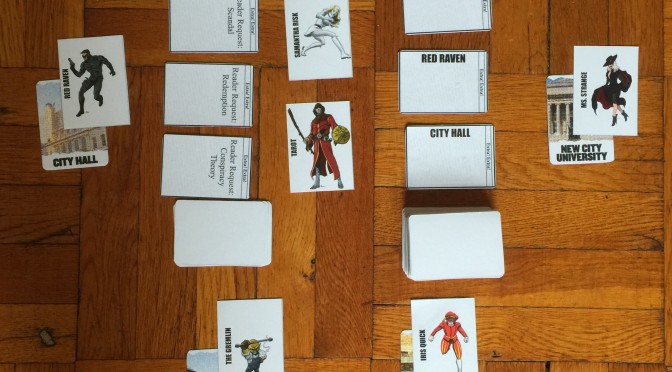
My local playtesting group was discussing print-on-demand providers for prototypes and we’d gotten into some of the nitty-gritty of laying out card images.

Print Play Games has some of the best services we’ve encountered, but have also found that the document setup can be a little bit painful compared to The Game Crafter’s online tools. One person mentioned the venerable ImageMagick as an option for quickly creating thumbnail sheets from individual card images, while also bemoaning the complicated-ness of figuring out precisely what the command-line needed to look like and hoping out loud that someone would write it up and share.

Since this is quite in my wheelhouse, I took it upon myself to create these command lines and after about an hour or two, have successfully written a command-line that processes a set of appropriately set-up individual card images into a PPG-ready file in an instant.

How to prepare your raw cards

Your cards should have the dimensions 1125x825px, which is a poker card on its side, accounting for 1/8″ bleed. For this command line, they’ll need to be named cards-1.png through cards-18.png.

How to set up your computer

There’s a link above to the ImageMagick tool, which has many installers available. Install it.

You’ll also need a transparent image with the dimensions 3600x5400px (or 12″x18″ aka “Tabloid Extra”), named ppg_blank.png.

The Command-line

If you’ve followed instructions precisely, you should be able to navigate to the directory that contains all your individual card files and run these two commands.

montage \
 cards-{1..18}.png -tile 3x6\
 -geometry '1x1<'+0+0 card_montage.png
composite card_montage.png\
 -geometry +112+225 ppg_blank.png finish.png

This command line can be pretty dense, so let’s unpack it a little bit. First, we’re running an ImageMagick tool named “montage” which takes a series of images and makes a thumbnail sheet. Then we’re adding our series of card images using a Unix short-cut for sequential filenames: {1..18}. The -tile and -geometry are called “flags” which let us tell the montage application how to process these files, e.g. we’re creating a 3-wide 6-tall tile grid, and NOT resizing anything, and NOT putting any space in between these images. Finally, we’re outputting a new file called “card_montage.png.”

The second one is a little easier. We’re using a tool called “composite” and using the -geometry flag to overlay our card_montage.jpg file and then offset it over the larger ppg_blank.png file. (recall: 1125 * 3 = 3375, which is less than the 3600. An 112px horizontal inset will center it within 0.5 pixels, and the same vertically). Finally, we’re writing that out to a file named “finish.png.”

This last output precisely matches PrintPlayGames poker card template, making it easy to upload a correctly set-up file!

Metatopia 2016 is just around the corner…

This now-five-year-old convention is the one I look forward to the most in a given year. All of Double Exposure’s conventions are great, but only one is specifically about to delivering excellent content tailored around designing games, for people designing games. And it’s open-armed, welcoming, and unbelievably full of interesting information from an incredible number of amazing people.

The games I’ve taken there have consistently gotten immensely valuable feedback. I’ve met phenomenal people and solidified casual acquaintances into fast friends. I’ve also been able to make a difference in people’s understanding of running their individual game businesses. And it’s the last part that I think is one of the most important to me. I thrive on helping people learn and succeed. And Metatopia is the single best place to do that in tabletop games.

I cannot recommend this convention enough. I really can’t.

I am going to be running four playtest slots of a game under the codename “Project CS,” which is a pickup-and-deliver deckbuilder. There are a few bits and pieces that need ironing, so if you’re going, I hope you’ll help me find and file off the remaining burrs. The game is also on the schedule for a for a formal announcement next week, so keep an eye on my twitter account (@dicefoodlodging) for more info!

Here’s the timetable of events that I’m an official part of, and I have lots of things I want to attend as well. Come and find me!

Friday
9-11am - Project CS
1-2pm - D017: Defining Success - Establishing Personal Metrics
2-4pm - Project CS

Saturday
1-2pm - D059: Theme: What is it Good For?
2-3pm - D065: Where I Stole My Best Idea
8-10pm - Project CS

Sunday
3-5pm - Project CS

Bonus: Brie Sheldon has written up some great tips on being a good playtester, just in time for Metatopia!
http://www.briecs.com/2016/10/convention-playtester-tips.html

Always Be Prototyping

Il meglio è nemico del bene
-Orlando Pescetti

Proto, from the Greek protos “first.” Type, also from the Greek typos which had a great many useful meanings, most of which had to do with a physical impression of something, like a dent or other struck-mark. Our modern understanding of a prototype, even a digital one, is consistent with its etymology: a first impression.

In digital games, the earliest prototypes are “paper prototypes;” constructed in this easy-to-iterate medium. These come before the rough digital incarnations known as “wireframes.” Eventually, “High-fidelity” prototypes are the penultimate step in the process in the creative construction. The stages, if not the language, are consistent with regards to the paper games we make.

I often refer to the paper prototype stage as an “alpha.” At this point, I’ve created a proof-of-concept, useful for testing assumptions, gameplay techniques, and a rough gauge of the complexity of my idea. Much like their digital counterparts, these are frequently hand-drawn and contain the least amount of information. There’s no point in making them any nicer since they are expected to change, usually by crossing out old information and scrawling in new.

Wireframes translate handily to the “beta” phase of game development. There might be placeholder art, computer-generated templates, and some early ergonomic affordances. We’re starting to fine-tune the mechanics of gameplay here, perhaps also trying to conceptualize the visual design, but that remains secondary as we are still trying to work out any functional flaws within the game system. It’s important not to skip this stage and move into high-fidelity prototypes too quickly as it often gives the impression that the game is more finished than is true.

High-fidelity prototypes represent mockups of the final product, before entering production. The visual treatments are considered most strongly here as well as the ergonomics. These are the showpieces that represent your product-to-be. They should be functional, appealing and coherent.

Each of these three phases often takes several iterations to complete, occasionally jumping backward from one to another as you discover things to address. They are all still prototypes—_first impressions_—and constantly, iteratively improving them, and validating your assumptions is the path to a final product.

And when is it a final product as opposed to a prototype? That’s the million-dollar question. There is no formula to tell you unequivocally when the development process is complete. But there are guidelines, deadlines, and other such process-based valuations that will help you make an informed decision.

In commercial design, deadlines are usually a defining factor. In a project scheduled for three months, you must have a final prototype at the end of that period. Other guidelines might have to do with performance, such as playtesting reports and an apparent lack of flaws. (The Minimum Viable Product model is one such metric that explicitly sets a release well before the design is in a final state.)

And now, having reached my intended word count, this article is concluded.

Threat or Menace video shoot!

A few months ago, my buddy Brian offered to help me make a video for Kickstarter purposes. As Threat or Menace is coming to fruition, we started planning it and shot it today with a bunch of great cast/crew. This is definitely the biggest-deal video I have been a part of making for my own purposes. In this one, I am writer/ producer/ talent/ crew. Just a couple of hats there. It’s lots of fun, and also exhausting.

The next steps for the video are the post-production pieces; color grading, editing, graphics, music, and voice over. Brian is wrangling a lot of that, meanwhile I’ll be continuing to plan the budget, writing the campaign page, contacting people to review the game, fine-tuning the rules document, and continuing to show it in order to build up interest and awareness.

I’m really excited that this is in the pipeline for release. It’s been a long time coming, and is proving to be worth the wait.

Threat or Menace!

The so-called “Superhero Game” of years-in-the-making has been recently renamed to the magnificently titled

Threat or Menace!

I’ve been chipping away at the 90% finished milestone for a while now. Through lots and lots of playtesting and wiggling the different moving parts, consulting with smarter-than-me-people about word choices, and trying to figure out how best to communicate the rules without wholly revisiting grammar classes.

And I think we’re about ready to move into a serious graphic design stage!

Which means, that Threat or Menace is part of the Brooklyn Indie Grab Bag that many Backstory Cards backers will soon have! I’m really looking forward to knocking that off my to-do list.